
Plan removal around the existing finish
Car Wrap Removal and Paint Safety
Car wrap removal starts with identifying the film, checking the paint and testing an accessible area. Follow the named product's removal requirements, keep adhesive cleanup separate and stop if the coating lifts or changes. Careful technique reduces avoidable damage, but no method can guarantee an unstable finish.
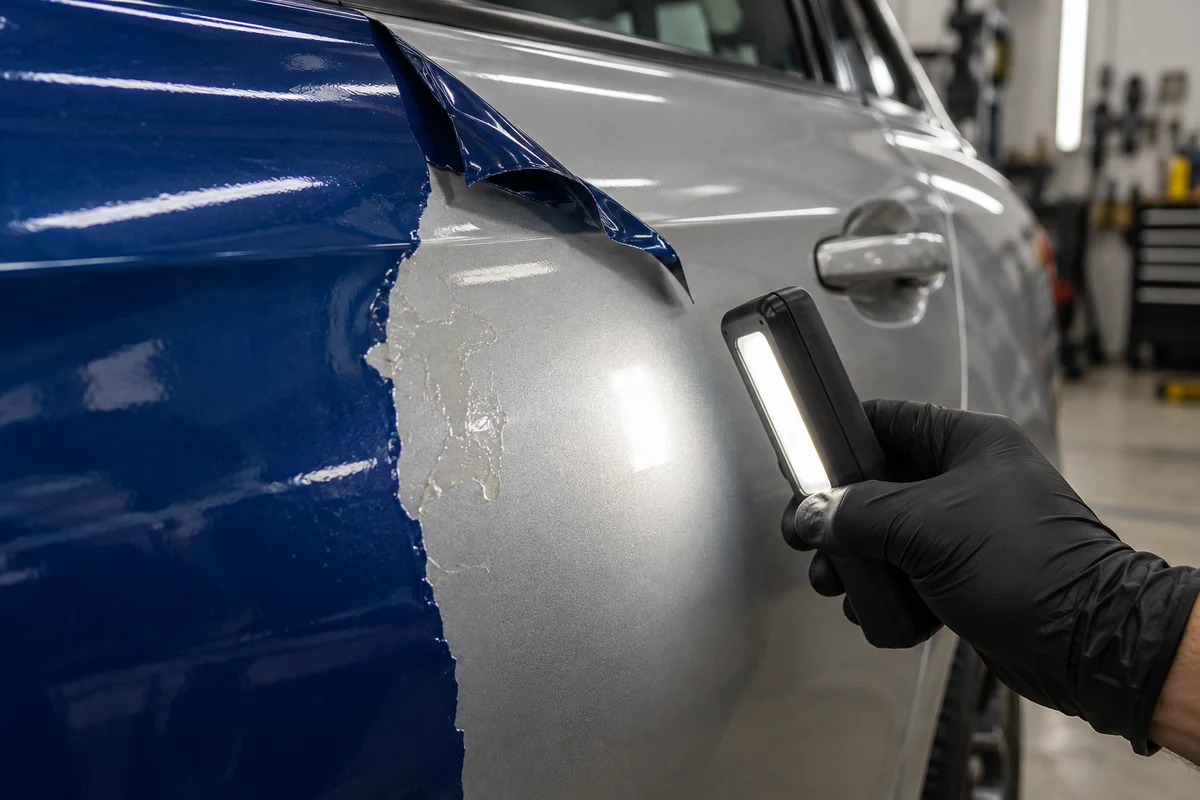
Can removing a car wrap damage the paint
It can. A removable film does not make every paint surface suitable for removal. Existing clear coat failure, uncured repairs, weak adhesion between paint layers and the condition of the film can all change the outcome. Careful handling reduces avoidable damage but cannot strengthen an unstable coating.
Factory paint and repainted panels both need assessment. A repaint is a reason to ask about preparation and curing, not proof that paint will come off. Equally, a factory finish is not a guarantee when it has chips, deterioration or repairs that were never recorded.
A good removal plan separates three findings. Adhesive left on the panel needs compatible cleanup. A lasting outline needs a dry-surface inspection. Paint attached to the removed sheet needs a coating assessment before that area continues. These findings should not be treated with the same cleaner or pulling force.
3M's graphics removal instructions explain how film construction, exposure, adhesive category and substrate condition affect removal. Check the bulletin for the actual product rather than treating a brand name as a damage-free promise.
Decide when the existing wrap needs attention
Review the named film's service and removal conditions alongside its actual appearance. There is no single two-year, three-year or five-year removal deadline that applies to every car in Dubai. Horizontal panels, outdoor parking, material construction and earlier damage can make areas of the same vehicle age differently.
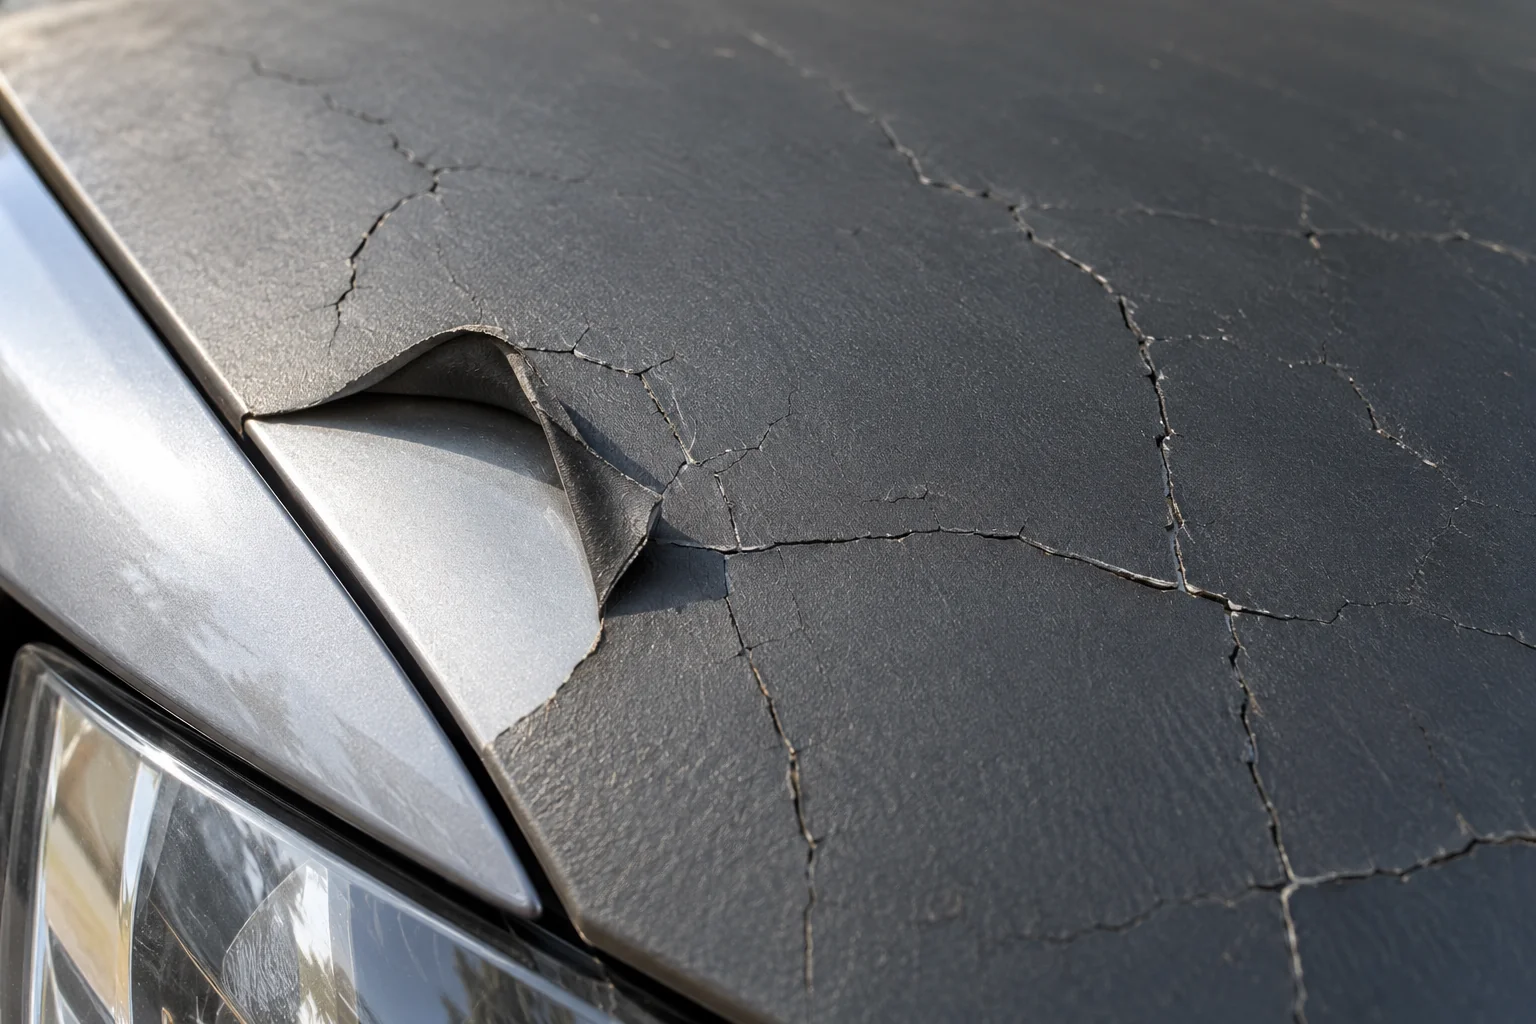
Arrange an assessment when the film cracks, breaks during gentle handling, lifts around returns or develops changes that approved cleaning does not resolve. An assessment can establish whether a local repair, selected-panel replacement or complete removal is appropriate. One small defect does not automatically justify stripping the whole car.
Check installation records if the vehicle is being sold, returned to a lessor or prepared for another finish. The required end condition matters. Removing the visible graphics alone may not satisfy an agreed return standard or make the panels ready for a new wrap.
Identify the film and the areas included
This guide concerns decorative vinyl on vehicle bodywork. Clear PPF, window graphics, lamp films and peelable sprayed coatings have different requirements. Tell the workshop what is fitted and where, including printed laminates, additional stickers and any older layer underneath.
Use the original invoice or installation record to establish the manufacturer, series and approximate fitting date. If those details are missing, say so. Appearance alone cannot reliably establish the adhesive or its removal limits.
List the panels, door returns, roof accents and trim pieces that should be cleared. Note known paintwork, filler, ceramic coatings and previous attempts at removal. Photos help explain the scope, but they cannot establish the condition of paint hidden beneath an intact sheet.
Use the first assessment to agree the next step
The first accessible test should inform the work plan rather than serve as a guarantee for every panel. A professional checks the release boundary, exposed coating and residue, then repeats the assessment where the material or surface changes.
| Finding | Meaning for the plan | Next step |
|---|---|---|
| Identified film on a stable test area | The product instructions can guide a controlled removal process | Agree coverage and continue checking each new area |
| Unknown material or repair history | The uncertainty needs to be recorded | Obtain records where possible and agree the assessment limits |
| Repeated fragmentation or resistant edges | The routine process is not working for that section | Pause and use a problem-specific assessment |
| Paint or clear coat transfers to the film | The coating has changed during the pull | Stop the affected area and arrange paint assessment |
Owners can gather records, photograph defects and describe earlier attempts without buying removal tools. Full-wrap work, heat equipment, uncertain coatings and component access are sensible reasons to use a trained specialist. A small decal should only be handled according to its own instructions on a suitable surface.
Prepare the vehicle and working area
Use a clean, dry work area where the panel can be observed. Remove loose contamination with products compatible with the existing film. Do not rub grit across the surface or apply a blanket solvent wipe without establishing what the cleaner is suitable for.
A car arriving from direct sunlight may need its panel temperature to stabilize before work starts. Ambient heat is not a controlled removal method. The operator needs suitable lighting, temperature measurement when heat is used, a safe tool resting place and clear access around the vehicle.
- Photograph visible defects and the coverage before lifting film.
- Identify tucked edges and components that may need access.
- Keep clean wiping materials separate from removed vinyl and contaminated cloths.
- Select protection, ventilation and gloves from the equipment and chemical instructions.
Access work should be agreed in advance. Removing a badge or trim part can add refitting tasks, clips or adhesive-backed components. It should be justified by the actual installation rather than included automatically on every car.
Follow a controlled removal sequence
The useful sequence is assessment, film release, residue cleanup and final inspection. It is not a fixed heat-gun setting followed by a universal pulling angle. Our comparison of wrap removal methods explains how hot air, steam and specialist equipment differ when choosing the process.
- Confirm the product requirements. Match the removal instructions to the identified film and substrate. Installation shaping or post-heating settings are not removal instructions.
- Reach a natural edge. Establish access without cutting through installed vinyl against the painted panel. A plastic tool can also mark a surface if damaged, dirty or used with pressure.
- Assess a manageable section. Observe whether the film remains controllable, what adhesive stays behind and whether the coating is stable. A successful door test does not clear a repaired bumper or cracked roof.
- Release the film under control. Support the loose sheet so it does not drag across exposed paint. Follow the product's direction and heat guidance while observing the release boundary.
- Recheck as the job changes. Stop when the film, coating or access behaves differently. Repeated resistance is information to assess, not permission to increase heat indefinitely.
- Inspect before cleaning. Identify the exposed residue and finish, then select the separate cleanup stage.
The tool display is not the temperature at the adhesive or paint. Airflow, movement, distance and panel conditions change the result. Likewise, a shallow pull is not universally correct. Manufacturer requirements differ, so avoid borrowing a single angle or temperature from an unrelated film.
For example, ORAFOL's vehicle film guidelines give removal conditions for the products covered by that document. They also specify trained specialists. Those requirements should not be generalized to every vinyl, window or protective film.
Keep adhesive cleanup separate from paint correction
Inspect the exposed panel before choosing a remover. Confirm suitability for the coating, any repairs and adjacent materials, then follow the product's test, application and cleanup instructions. A citrus description does not establish compatibility with every finish.
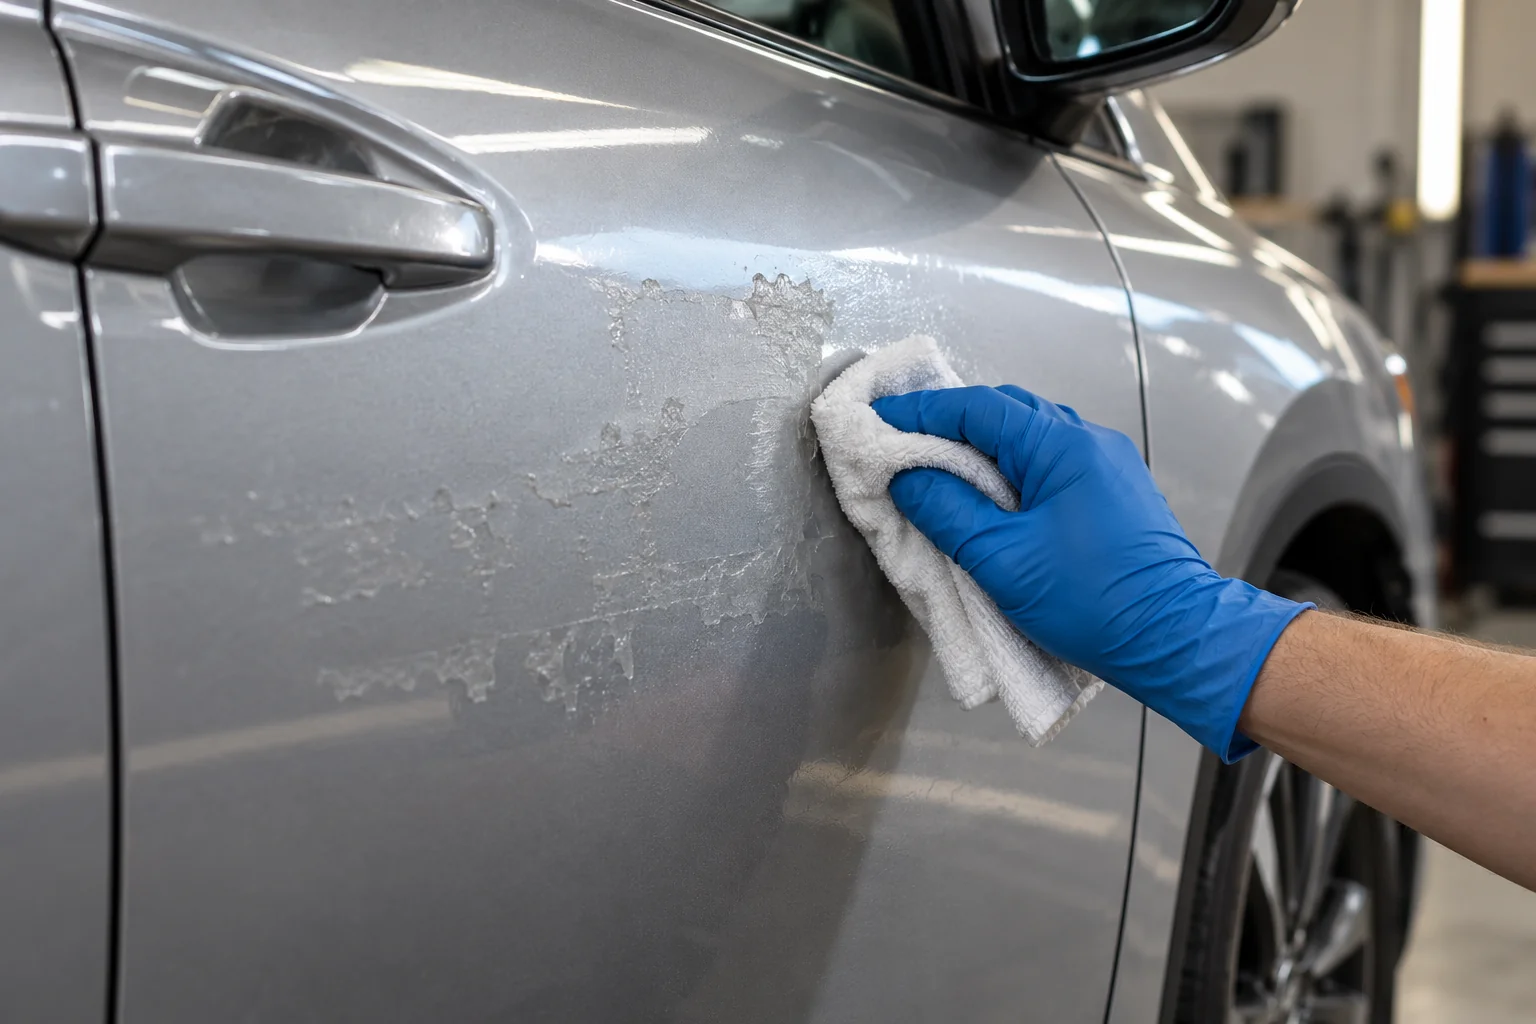
The 3M 08984 cleaner technical sheet identifies professional use, flammability and restrictions around fresh or uncured paint. Keep heat work separate from chemicals and follow the safety information for the actual product used.
After approved cleanup, inspect the dry finish. A color difference or outline may remain even when the sticky layer is gone. More solvent or polishing is not automatically the answer. Polishing also cannot replace paint or clear coat that has detached.
Pause when the removal no longer behaves normally
Stop the affected area if paint transfers, the finish changes during chemical treatment, film repeatedly fragments or access becomes unsafe. Retain the removed piece and photographs. Do not disguise a problem with wax, another sticker or an additional wrap layer.
A crack, resistant edge and separating laminate need different checks. Our stubborn vinyl removal troubleshooting guide helps distinguish those problems and explains what information to provide after an unsuccessful attempt.
If work has already been tried elsewhere, name the equipment, cleaners and tools used. Product containers, labels and any recorded temperature readings help the next technician assess the remaining task. Avoid adding another treatment while advice is being arranged.
Compare removal quotes using the same scope
The vehicle size alone does not establish the labor. Film condition, number of layers, tucked returns, residue and access work can change the task. A photograph-based estimate may need a removal test before a firm scope can be agreed.
- Specify the panels and returns included in film removal.
- Identify whether adhesive cleanup and final inspection are included.
- Separate trim access, refitting and replacement parts where needed.
- Keep proposed polishing, paint repairs and new wrapping identifiable.
- Confirm the payable total, VAT treatment and approval process for additional work.
Do not compare a vinyl-only price with a quote that includes cleanup and refitting. Ask how the workshop will document unexpected findings before extending the work. Removal does not automatically include restoring every cosmetic defect exposed beneath the film.
Check the dry panels before collection or rewrapping
Inspect the completed areas together, including edges that were tucked behind components. Check agreed residue cleanup and the condition and function of any disturbed fittings. Compare visible findings with the initial photographs and record anything requiring a separate repair decision.
For another wrap, the installer should confirm that remaining adhesive and cleaner residue have been removed, the coating is stable and necessary paintwork has cured to its supplier's requirements. A clean-looking panel is not automatically ready for a new adhesive film.
For a sale or lease return, use the actual agreed acceptance requirements. Keep the invoice, scope and final photographs with the vehicle records. Do not approve polishing or a replacement wrap solely to hide an unexplained mark.
Choose the plan from the film and the paint
Identify the material, assess the coating and agree the removal scope before committing to the whole vehicle. Keep film release, adhesive cleanup and paint repair as separate decisions. A controlled first test reduces uncertainty but cannot guarantee every hidden surface.
Questions before removing a car wrap
Can only one wrapped panel be removed
Selected-panel removal may be possible. Check the design boundaries, tucked edges and condition of adjoining film. If a replacement panel is planned, agree the finish match separately rather than assuming the old and new material will look identical.
Do I need to buy a heat gun before arranging an assessment
No. Installation records, repair history and clear photographs are more useful first steps for an owner. The workshop should choose equipment from the identified material and the task. Owning a tool does not establish that the coating is suitable.
Does glue left behind prove the wrong film was fitted
No. Residue can occur with recognized products. Review the material, exposure and removal conditions before assigning a cause. Confirm whether the agreed quote includes the separate cleanup stage.
Can the workshop promise no paint damage
A universal promise would overlook unknown repairs, coating condition and concealed defects. Ask what can be assessed before work, how each panel will be checked and what happens if the exposed coating is unstable.
Can the car be wrapped again on the same day
That depends on the remaining cleanup, paint condition, repairs and the new film's preparation requirements. Agree readiness after inspection. Required paint curing cannot be replaced by a same-day schedule.
Agree the scope before starting
Arrange a car wrap removal assessment
Share your car model, wrap age, known paint repairs and photographs of the film. Our Al Quoz workshop can discuss inspection, removal scope and preparation for your next finish.