
Vinyl positioning tools
Magnet Holders vs Masking Tape for Car Wraps
Use magnets to support lined vinyl on suitable steel. Use compatible masking tape for alignment references and permitted hinges. Choose by the task, panel material and contact surface.
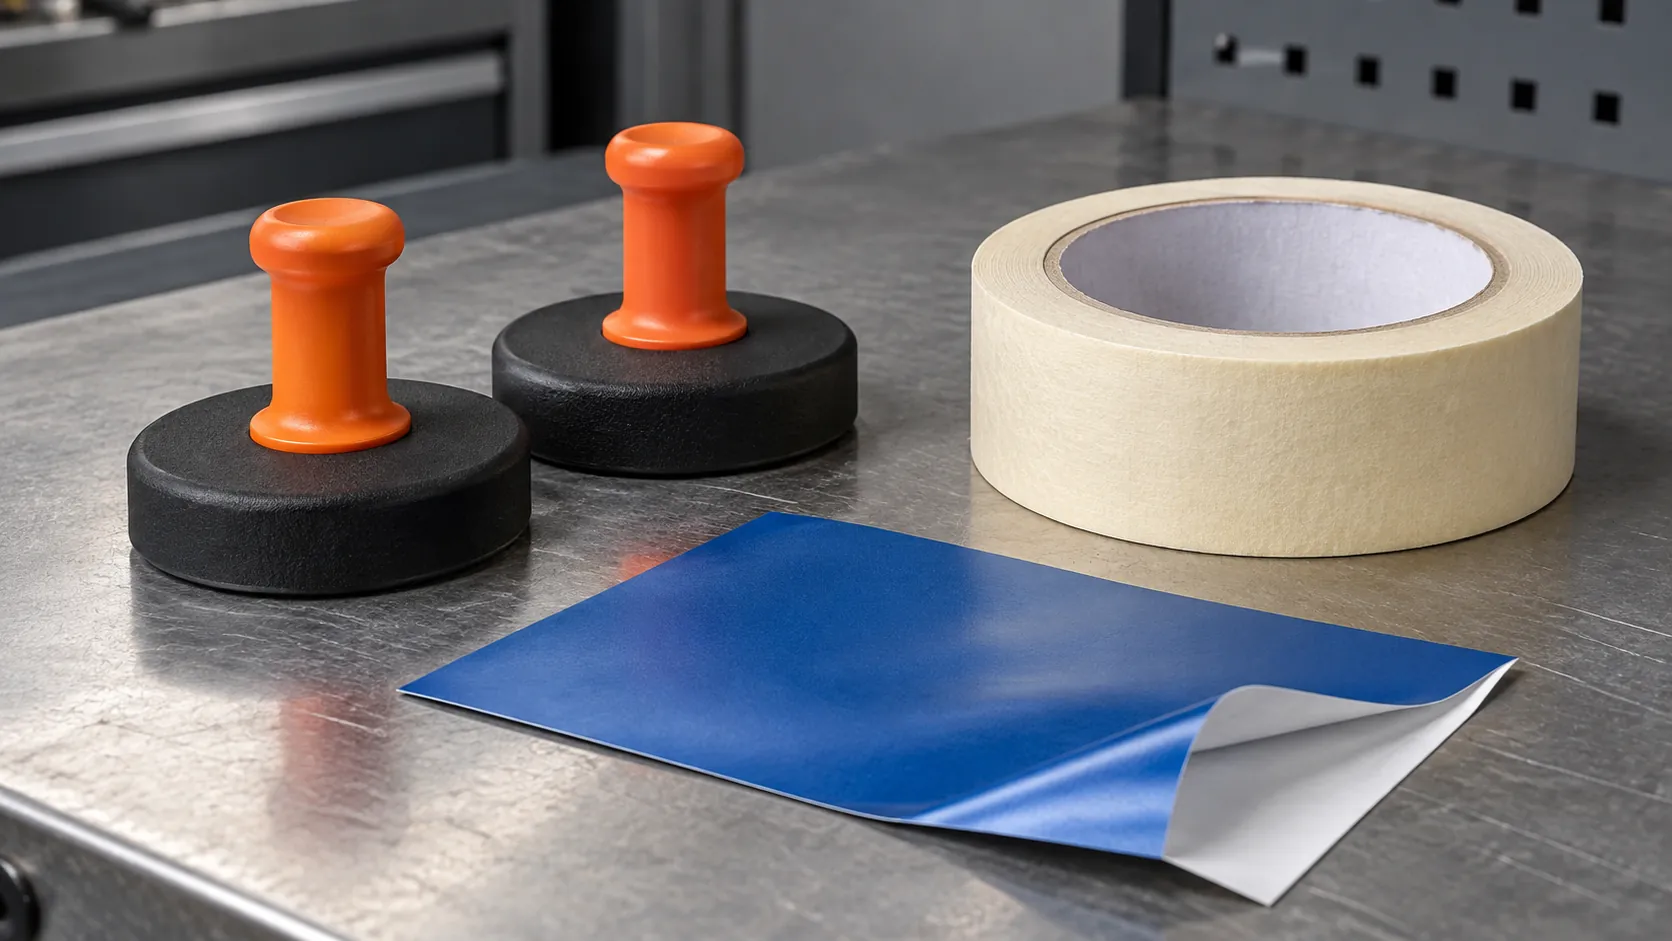
Choose the holder for the job it needs to do
Magnet holders are useful for supporting a relaxed vinyl sheet on a suitable steel panel while you check its position. Masking tape is useful for temporary alignment marks and, where the material and application method allow it, a positioning hinge. They often belong in the same kit because holding a sheet and recording its alignment are different jobs.
A wrap magnet is a temporary fitting tool with a handle and a protected contact face. It attracts to the steel beneath the material. Masking tape holds through its adhesive, so its suitability depends on the surface it touches, the tape specification and how it is removed. Neither tool improves the vinyl’s final bond to the car.
| Task or condition | Magnet holders | Masking tape |
|---|---|---|
| Support during a dry fit | Useful on confirmed steel when the contact face and grip are suitable. | Can provide temporary support where its adhesive is compatible. |
| Record a reference point | Moving the holder loses its earlier position. | Removable marked tabs can preserve an alignment reference. |
| Aluminum or plastic panel | An ordinary magnet does not attach directly. | Does not require steel, but still needs a suitable contact surface. |
| Repositioning | Lift and relocate without leaving tape adhesive. | Remove or replace tabs within the tape’s permitted use conditions. |
| Main contact risk | Trapped grit, damaged pads or uncontrolled movement. | Incompatible adhesive, residue or lifting a weak coating. |
| Working under tension | Do not assume a relaxed-sheet hold will resist stretching. | Do not use extra tape to overcome an unsuitable fitting method. |
For a lined sheet across a steel door, magnets can provide support while separate tape tabs record the intended position. On a plastic bumper, the magnetic part of that setup will not work. The bumper also has a different shape, so replacing every magnet with tape is not necessarily a workable application plan.
Confirm the material of the actual panel
“Metal bodywork” is too broad a description. Ordinary wrap magnets attach to suitable ferromagnetic material, commonly steel. Aluminum is metal but does not provide that attachment. Plastic, glass and carbon-fiber panels also do not become magnetic because they have a painted or glossy surface.
Check the panel you will work on, rather than assuming that the entire car uses one material. A vehicle can combine steel doors with an aluminum hood and plastic bumpers. Model information can help, but repairs and replacement parts make an assessment of the actual panel useful.
If checking attraction with a suitable covered holder, keep it under hand control and support the sheet independently. Do not drop a magnet towards the finish to see whether it catches. Weak or uncertain attraction is a reason to change the setup, not to suspend more material from it.
Some manufacturers offer additional mounting systems for non-magnetic surfaces. Yellotools describes SpeedMag HD used with GeckoPatch products for glass or aluminum. That is a combined system, rather than direct magnetic attraction to those materials. Check the adapter’s own attachment and removal instructions before using it on a vehicle.
Inspect the contact face before it touches the finish

A rubber or fabric contact face reduces direct contact with a hard magnet, but it does not make the tool scratch-proof. Inspect the underside for embedded grit, torn coverings, exposed edges and adhesive left from earlier work. A soft pad carrying a hard particle can still damage a surface.
Keep the holder in your hand as you place it. Move it by lifting and relocating it, rather than dragging its base across the film or paint. Keep fingers clear of the closing contact area and follow the manufacturer’s handling guidance. Stronger attraction also makes controlled placement and removal more important.
Check the film face as well as the paint. A dirty tool can mark a visible finish, and concentrated pressure may leave a sign that needs assessment. A top protective layer, where supplied, has its own handling rules. It should not be treated as permission to use any holder or adhesive over it.
Use replacement pads or covers intended for the tool. An improvised thick cloth may change how well it holds, and a dirty cloth creates another contact risk. The separate cover shown above is an example of the contact area to inspect, not a recommendation to add the same cover to every magnet.
Prepare and dry the vehicle before positioning aids are used. Our wrap surface-preparation sequence covers that work. If the paint is peeling, recently repaired or of uncertain condition, assess its suitability first. Choosing a gentler holder cannot resolve a failing coating.
Select tape for the surface it will actually touch
Look for a tape whose documentation covers the intended substrate and conditions. “Low tack”, a particular color and “painter’s tape” are not universal compatibility guarantees. An automotive masking product designed for a refinish task may have different limits from a tape recommended by a vinyl manufacturer for positioning.
Identify each contact area before applying it. Tape on sound paint, a paper release liner, a vinyl face and a removable protective layer are four different situations. Choosing a product for one does not establish that it is suitable for the others.
Example limits for 3M 03423 and 03425
The 3M sheet for Automotive Refinish Masking Tape 03423 and 03425, dated July 2014 and checked on October 9, 2026, gives these product-specific conditions.
| Condition | Published guidance |
|---|---|
| Application surface temperature | 16–27°C on clean, dry surfaces |
| UV exposure | Indoor use; UV resistance up to four hours. Avoid prolonged sunlight and heat. |
| Heat resistance | Up to 121°C for up to 30 minutes. This is not the application-temperature range or permission to heat vinyl to that temperature. |
| Removal | The sheet specifies a 90-degree pull for these tapes. Check surface compatibility first. |
The four-hour UV rating is not a universal clean-removal dwell time. Remove temporary tabs promptly within the exact tape and surface instructions. These medium-to-high-adhesion refinish tapes are specification examples, not blanket recommendations for contact with wrap faces or protective layers.
There is a separate restriction for some film surfaces. 3M’s 1080 and 2080 wrap-shop FAQ warns against masking tape on the protective film layer supplied with 2080 gloss products. Check that guidance before placing a positioning tab there. Do not remove a useful protective layer early merely to create a place for tape.
Where a compatibility test is appropriate, use the actual materials and the intended contact time under their permitted conditions. Inspect removal as well as initial grip. A successful short test cannot guarantee that tape left on a hotter panel for hours will behave the same way.
Household packing tape and duct tape should not be substituted simply because they hold more firmly. More aggressive adhesion can make later removal the problem. Choose a permitted contact point or a different support method when suitable positioning tape cannot be used.
Use removable tabs to keep an alignment reference
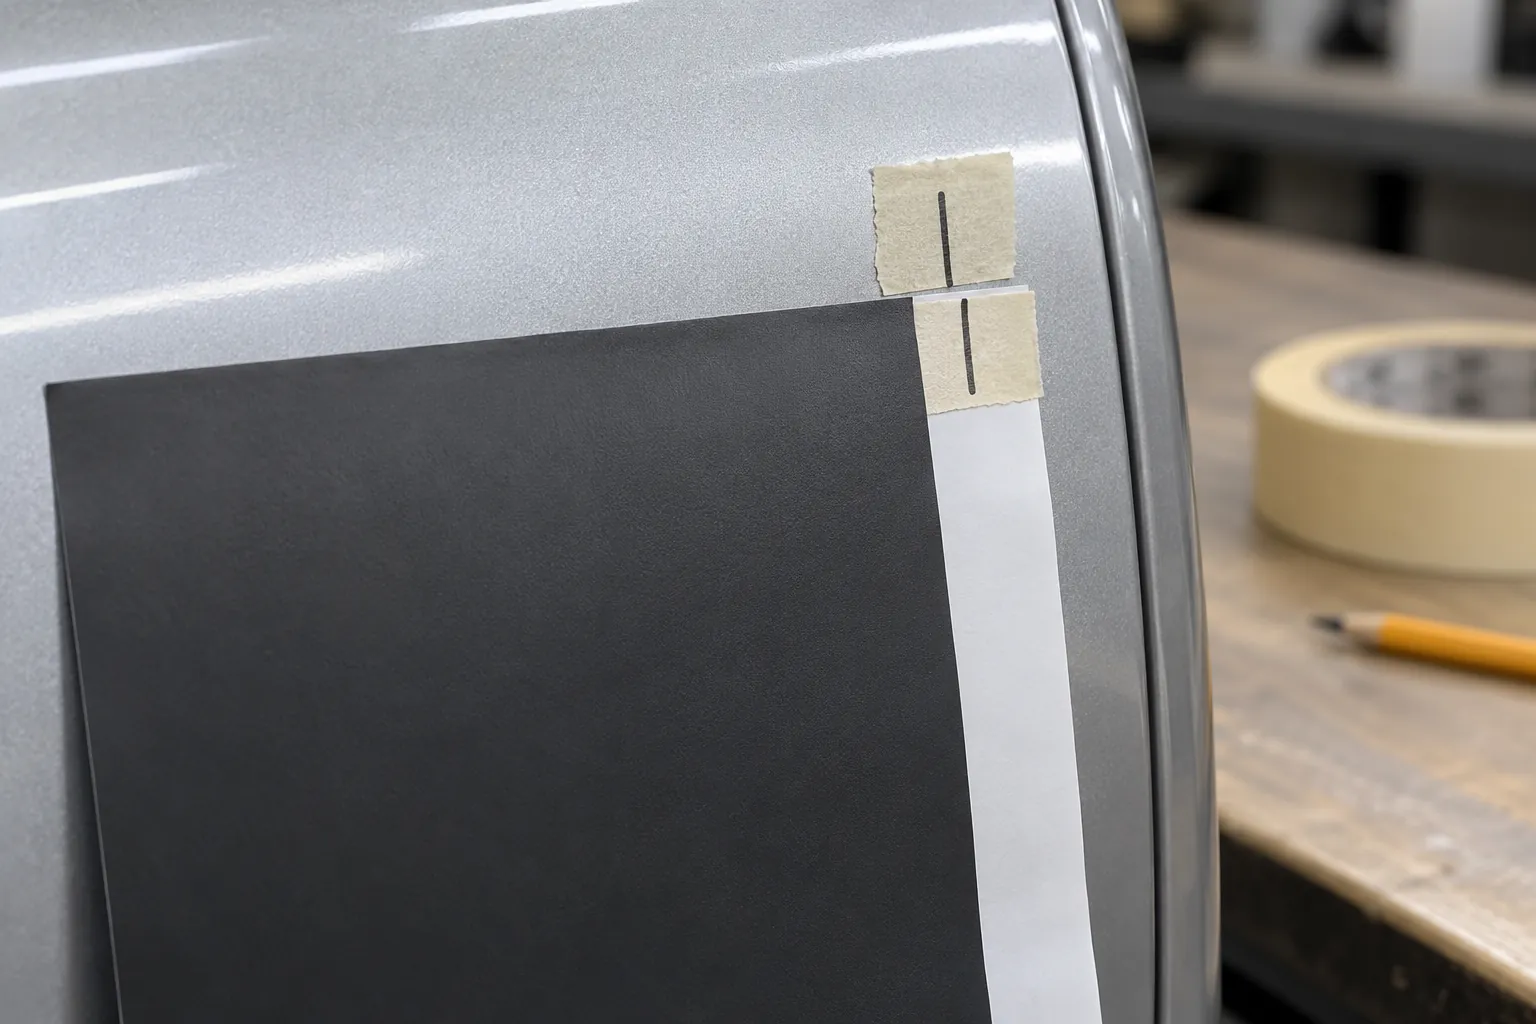
A holder tells you where the sheet is now. A reference tells you where it needs to return after it has moved. This matters when fitting a graphic relative to a door line, preserving an intended margin or checking a design across adjacent panels.
With the release liner still on, establish the intended position and measure from reliable vehicle features. Place compatible removable tabs on permitted areas beside the material and, where appropriate, on its backing margin. Mark corresponding lines on those tabs so movement becomes visible. Two suitably spaced references help reveal rotation as well as a simple sideways shift.
Keep the references clear of the area you will squeegee and of edges that need finishing. A mark hidden beneath the sheet is difficult to use. Record important measurements before a reference must be removed so you do not lose the only indication of the intended layout halfway through application.
For directional colors, printed graphics or adjoining pieces, confirm the material orientation and design alignment before releasing adhesive. A neatly matched tape mark cannot correct a piece cut or rotated in the wrong direction. It only helps you return to the position you established.
Draw on the removable reference, not directly on a visible finish. 3M’s wrap-shop guidance recommends masking-tape alignment marks and cautions against grease-pencil marks that can become embedded in textured film. Keep any backing-paper marks away from surfaces where ink might transfer.
For an unprinted color-change piece, coverage allowances may matter more than precise registration. Use enough references to preserve the checks that matter, without covering the vehicle in tabs that have no purpose.
Dry-fit lined film before exposing the adhesive
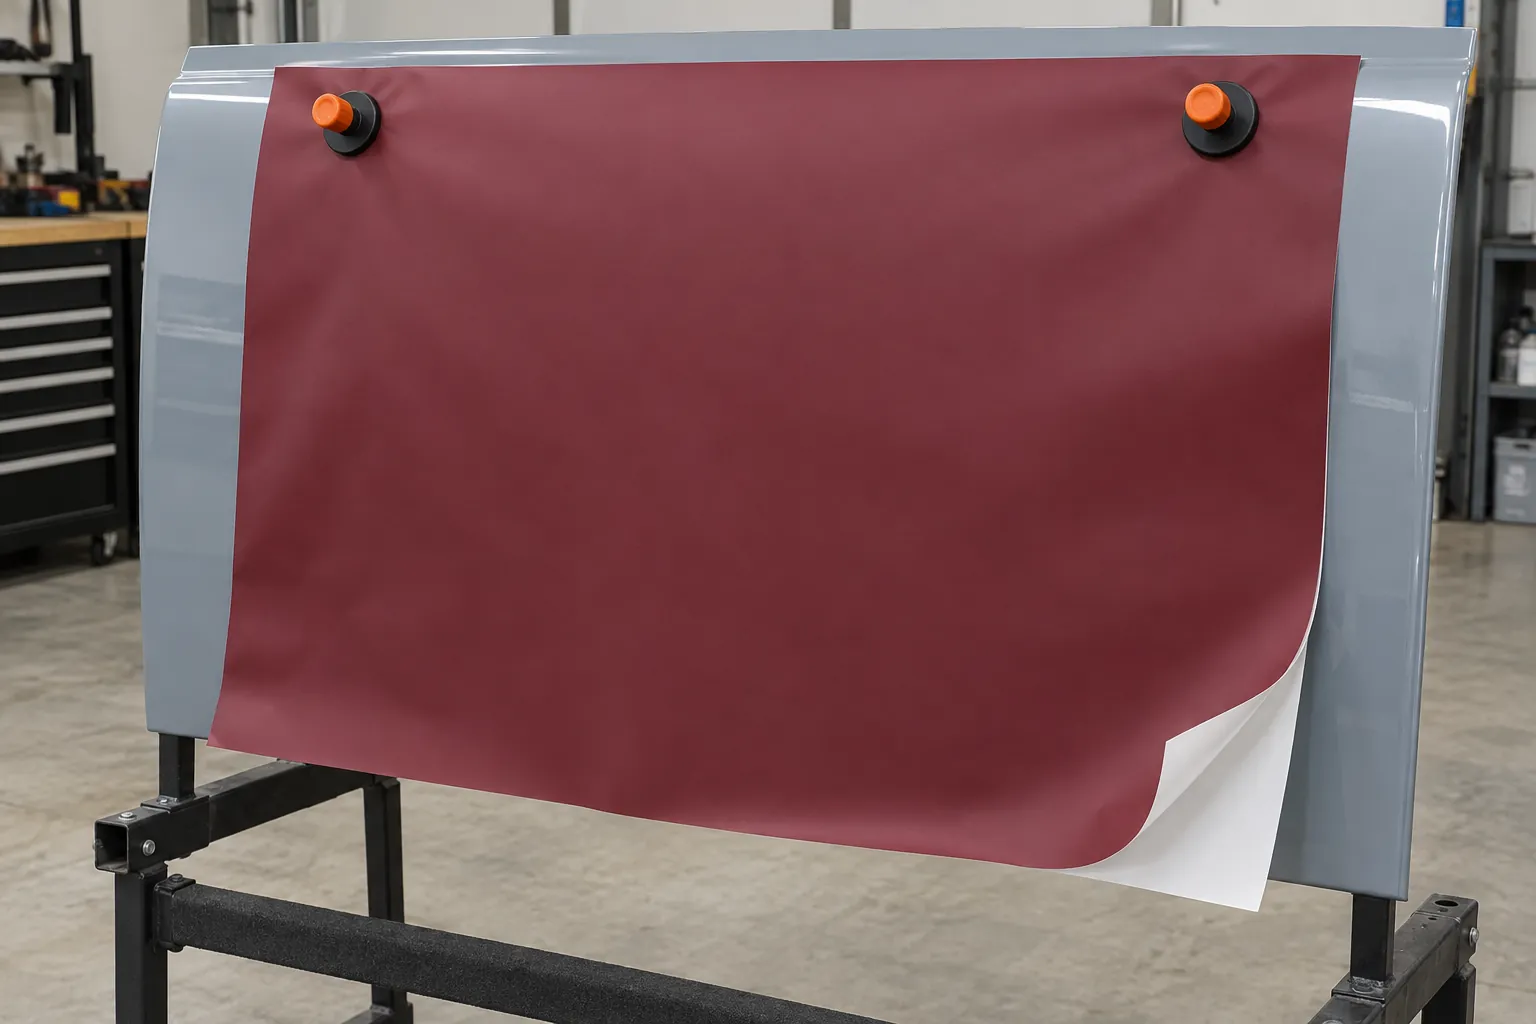
The simplest comparison is made while the backing remains attached and the sheet rests without significant tension. At that stage you can check coverage, material direction and access without asking the film adhesive to act as another positioning aid. A holder that works here still needs reassessment when the liner comes off.
- Plan the piece. Confirm its orientation and that it provides the coverage required by the film’s fitting method. Include the edges and returns that will be finished.
- Support it before placing the aids. Keep the sheet under control and position suitable holders or permitted tape tabs where they will not obstruct the first working area.
- Check the layout while it is relaxed. Compare the panel boundaries, reference points and available material. Do not pull it tight just to make the initial position look tidy.
- Plan the release. Decide how the liner will be removed, which part of the film will be controlled first and where the unused material will be supported.
- Move aids as the work progresses. Support the free material before relocating a holder. Keep tools and tape out of the path of the squeegee and the area being bonded.
These are positioning checks, rather than a universal application sequence. The film manufacturer’s instructions and the panel shape determine the actual fitting method. A center hinge suited to a flat graphic should not automatically be carried over to a large curved color-change panel.
Removing the liner changes how the sheet behaves. Pulling it away can disturb alignment, and exposed adhesive can contact the car or nearby objects unexpectedly. Avoid leaving the whole piece unsupported while both hands are occupied with the backing.
A large hood or side graphic may need another person to support the material even when holders are available. Plan that help before exposing adhesive. Magnets can free a hand during some positioning tasks, but they do not establish that every sheet can be installed alone.
Reassess support when the sheet starts to move
A holder supporting relaxed lined film may move when the liner comes off or the sheet is shaped. Keep the material supported while changing the setup. Position magnets on stable contact areas and keep tape references clear of the working path.
Use a controlled workspace. Wind can disturb loose film and introduce contamination. Check the actual panel conditions against the film, tape and tool instructions, especially when the vehicle has arrived from direct sunlight.
A pull-force label does not establish grip in this arrangement. The magnet model and specification comparison explains pull, shear, footprint and release control. Here, the practical decision is whether the positioning method maintains control as the application progresses.
Reset the setup when it no longer controls the sheet
Stop when the support moves or the material changes shape unexpectedly. Keep the sheet supported, remove the load from the failing aid and inspect the cause. Continuing to pull while adding another magnet or strip of tape can hide the reason the setup stopped working.
| What you notice | Check first | Useful response |
|---|---|---|
| A magnet slides | Panel material, contact gap and direction of load. | Support the sheet and reassess position or method. |
| A tape tab lifts | Compatibility, permitted conditions and load on the tab. | Replace the unsuitable setup instead of adding aggressive tape. |
| Alignment marks separate | Translation, rotation or movement during liner removal. | Return to the recorded measurements before bonding further. |
| A fold starts at a holder | Local pressure or constrained material movement. | Relieve the constraint and review the fitting sequence. |
| The surface shows a mark | Contact pad, debris and the condition of the finish. | Stop and assess it before placing the aid there again. |
If adhesive has already contacted the panel, follow the film’s permitted repositioning method. Do not assume it can always be lifted, tugged back into place or washed clean after contamination. The positioning tools should prevent loss of control, rather than become a way to recover unsuitable material indefinitely.
Decide whether your task needs both aids
For occasional reference marks on a compatible surface, suitable tape may already meet the need. For repeated dry fitting on steel, protected magnets can support the sheet while separate tabs preserve its alignment. Buy around the work you actually do.
Test the method with representative lined material while keeping the sheet supported. Check positioning, liner removal, aid relocation and controlled release. If the piece still needs a second installer, additional holders should not be assumed to replace that help.
Keep magnet faces protected and store tape under its supplier's conditions. Replace damaged or unsuitable aids before they touch the finish. The car wrap tool-kit guide places these tools alongside the rest of the fitting equipment.
Remove the positioning aids and inspect the working area
Remove tape within its permitted use period and by the method specified for that product. Do not apply one removal angle or speed to every adhesive and surface. If the coating lifts or removal becomes difficult, stop and assess the area rather than pulling harder.
Account for all holders and temporary tabs before the relevant heating, edge-finishing and inspection stages. Keep aids clear of those operations according to the product instructions. Check for residue, contact marks and anything trapped beneath an unfinished edge.
Finally, inspect the vinyl’s own bond and finished edges. A holder is temporary support, and masking tape is not a repair for lifting wrap. An edge that will not stay bonded needs assessment of the surface, material and installation, rather than a strip of tape left behind.
Common questions about wrap positioning aids
Is application tape the same as masking tape?
No. Application or transfer tape carries cut graphics from their backing to the intended surface. Masking tape is used for tasks such as temporary references. Choose each material for its specified purpose and the graphic or film it contacts.
Can masking tape replace knifeless cutting tape?
No. A knifeless cutting-tape system contains a cutting filament and has its own fitting procedure. Ordinary masking tape does not provide that function or make a knife cut on painted bodywork safe.
Can a magnetic advertising sheet replace a wrap holder?
A magnetic sign sheet is a different product from a handled positioning tool. Its intended use does not establish that it can support lined wrap material during fitting. Use a tool specified for the positioning task.
Does the same method apply to wet-installed PPF?
Do not transfer a color-change vinyl sequence to PPF automatically. Follow the exact film’s instructions for solutions, surface conditions and positioning aids. In particular, introducing liquid is not an appropriate assumption for a dry-application vinyl system.
Discuss your wrap project
Planning a wrap for your car?
Share the vehicle model, paint condition and intended finish with our Al Quoz workshop to discuss the wrapping work.