
Cutting, seams and edge finishing
How to Plan Car Wrap Cut Lines and Seams
Plan car wrap cut lines around the panel’s movement, the intended colour boundary and the material needed to finish an edge. Use suitable knifeless cutting tape for supported on-car cuts, and keep blade cutting on a separate safe surface wherever possible. The plan should distinguish a decorative colour boundary from a join between moving panels.
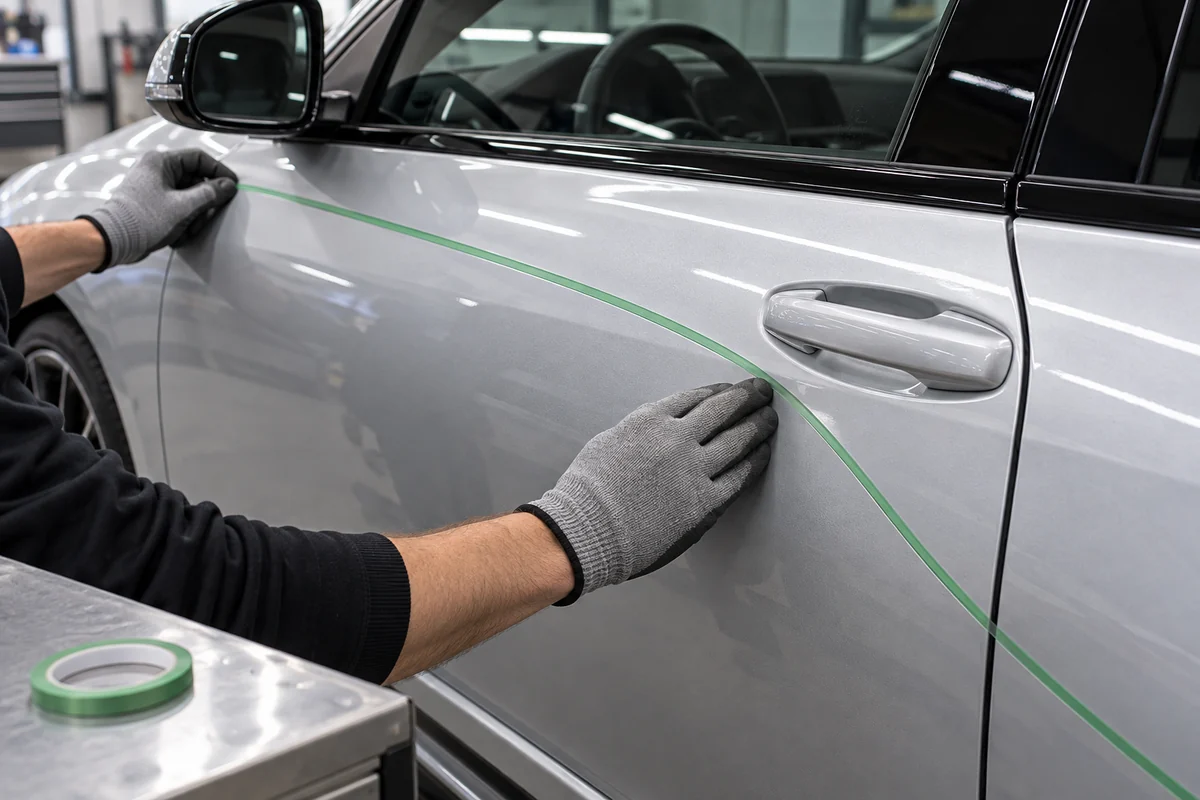
Give each cut line a clear purpose
A decorative boundary, a door opening and a turned-in edge ask the installer to solve different problems. A two-tone boundary controls where one colour meets another. A panel gap lets parts move independently. An edge return leaves material to finish around the end of a panel. Decide which job the line serves before choosing its position or cutting tool.
For a decorative split, view the proposed route from normal standing distance as well as close up. A line that looks straight beside the door can appear to rise sharply over the rear quarter. Use the actual vehicle as the reference, with the doors closed and the normal trim present. Check the intended look from both sides without assuming the body is perfectly symmetrical.
Check the position of handles, fuel flaps and removable trim while planning the route. A styling crease may help a colour boundary look deliberate, but it does not automatically provide a suitable film join.
Agree the difference between exterior coverage and wrapping inside the door jambs. A complete change of the visible body colour can still leave original paint inside an open door. Record that coverage choice before laying out the edges, rather than discovering it at handover.
Check paint condition and access before marking
Inspect the planned route for chips, peeling clear coat, previous repairs, old adhesive and loose trim. Take photographs before covering these areas. A line placed beside weak paint does not make the coating sound, and a clean-looking outer panel does not establish that a hidden return is ready for vinyl.
The underside of an edge needs suitable cleaning and drying if it will receive film. A clean broad face with grit or moisture inside the return can leave the finish vulnerable where it ends. Avoid pushing material into a gap simply because the contamination is out of sight. Follow the film’s preparation requirements for the surfaces actually being covered.
Open the relevant door or flap and establish the available access before installation. Note rubber seals, drain openings and parts that must operate normally. If a component needs removal, agree the access and refitting work with someone able to handle it correctly. Do not dismantle a handle or sensor merely to hide a proposed seam.
Use adequate lighting and a stable working position. Check the panel and room conditions against the film’s application requirements before starting, especially when the vehicle has arrived from direct sunlight.
Choose a cutting method for the actual job
On-car design cuts and off-car material cutting are separate tasks. Filament tape can create a boundary through compatible film already positioned over its route. A blade plotter prepares a defined shape before application. Bench cutting sizes loose material or trims an offcut on an appropriate cutting surface.
| Method | Useful job | Check first |
|---|---|---|
| Knifeless cutting tape | Supported design boundaries and finishing cuts on the vehicle | Tape variant, film layers, route and access to the filament |
| Blade plotter | Repeatable shapes cut from a verified digital file | File scale, supported material and a successful test cut |
| Bench blade or shears | Preparing loose sheets and separate sample pieces | Stable cutting surface and hands clear of the cutting path |
A lightly pressed blade can still score paint. Prepare loose material on a cutting mat and use compatible filament tape for the planned on-car boundary. Keep hands away from the blade path when sizing separate pieces.
Match knifeless cutting tape to the film
Knifeless tape contains a filament that makes the cut beneath the applied film. The carrier holds the route, while the cutting element does the separating. Different products are intended for different curves, materials and layer combinations. A familiar green roll is not enough information to establish compatibility.
3M’s knifeless tape selection guide distinguishes these applications. Use the current instructions for the exact product and test the film combination before committing to a vehicle.
| 3M tape family | Application described in the guide | Selection question |
|---|---|---|
| Design Line | Intricate routes and tight curves in single-layer graphics | Is the intended layer combination supported? |
| Finish Line | Edge trimming, including multiple layers and laminated graphics | Does the route suit its gentle-curve handling? |
| Bridge Line | Trimming across wider panel gaps | Can the carrier span the intended opening correctly? |
| Precision Line | Trimming tougher film constructions | Have the exact film and tape been tested together? |
Include the actual laminate, protective layer or overlap in the test. For a deliberately spaced stripe or butt join, also check whether a suitable Tri Line arrangement is appropriate. It is a separate tape choice from a single cut line.
Lay out the route and start the filament correctly
Mark the boundary before applying the film. Check the line from both sides of the closed vehicle and leave the tape ends accessible. Practise the selected tape with the complete film assembly on a separate panel.
The 3M knifeless tape application bulletin gives the following starting sequence for its standard tape families. Precision Line has a separate starting procedure.
- Leave working ends. The bulletin specifies 15.2–20.3 cm of tape before and after the graphic area.
- Apply the film. Keep both ends exposed, then fold the starting carrier back about 7.6 cm.
- Expose the filament. Hold the folded carrier as illustrated in the bulletin and snap it to release the cutting element.
- Start at the film edge. Pull back towards the cut route, support the starting edge and gently start the cut.
- Continue backwards. Keep the pull directed back rather than lifting the filament upwards.
- Remove the waste and carrier. Check that every carrier piece has been removed before finishing the film edge.
Do not wind the filament around fingers or hands. It can cut skin. Dispose of the used filament promptly and avoid leaving the tape in prolonged sunlight. Complete edge finishing to the selected film’s instructions.
A practice cut should release the waste cleanly, leave a continuous boundary and allow the carrier to come out without pulling the retained film out of position. A failure on the sample is a reason to change the setup before working on the vehicle.
Treat templates as references that need measurement
A vehicle outline helps plan the appearance of a stripe or colour split. It does not necessarily provide a cut-ready shape with the correct edge allowance. Check the template’s purpose, scale and vehicle variant, then compare it with measurements from the car. Bumpers, handles and aftermarket parts can change what is actually fitted.
A photograph is useful for a design discussion, but perspective changes apparent distances and shapes. Tracing its visible contour into a vector file does not establish real dimensions. Keep photographs for appearance checks and measured references for production. Save the agreed version so a later file change does not silently move the boundary.
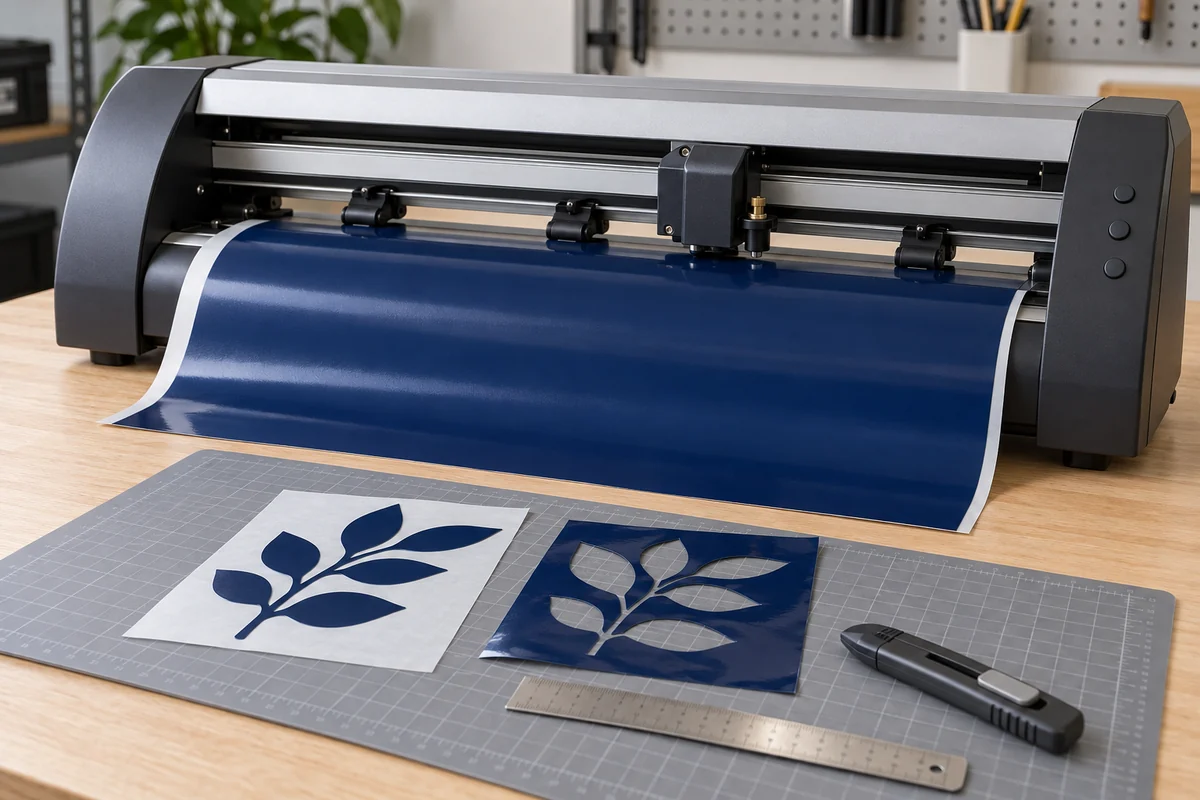
For plotter work, use a suitable blade and a test cut before producing the final piece. Roland DG’s cutting guidance identifies blade force, cutting speed and blade-tip offset as separate settings, and warns that its reference conditions do not replace a test. Keep the test piece and approved file version together for comparison.
PPF patterns are another distinct tool. A pattern intended for a protective film and its installation method should not automatically become the template for a colour-change vinyl return. Our guide to preparing custom wrap graphics covers artwork, scale and production in more detail.
Separate panel gaps from decorative boundaries
A stripe may continue visually across a door and rear quarter while the film is physically divided at the shut line. Align the appearance with the panels closed, then respect the separation required for movement. Avoid leaving one sheet connected across an opening and expecting the first door operation to create the separation.

Avery Dennison’s Supreme Wrapping Film application instructions require cuts at joins between vehicle panels and firm application at finished edges. They also exclude wrapping over rubber and plastic mouldings. Follow the named film’s instructions for the particular area instead of treating every visible gap as the same detail.
Plan a two-tone door across two separate panels
Consider a copper lower section continuing from the door onto the rear quarter. With the door closed, establish where the copper meets the upper charcoal colour. Then mark the door shut line separately. The colour boundary may run across both panels, while each panel’s film finishes independently at the opening.
Open the door to check the return, seal and visible original paint. Record both routes on the agreed layout. A continuous-looking stripe should not depend on leaving film connected across the door gap. For a design that needs pricing and fitting, discuss the layout through our car stripe installation service.
Keep important lettering and faces away from unavoidable panel breaks when planning printed graphics. Closing the door can hide part of a design that looked complete on the bench. Open and close each relevant part during the finishing check, without dragging an unfinished film edge through a tight gap.
Compare a panel gap, butt join, overlap and inlay
These details can look similar from a distance but serve different jobs. Decide how the film should meet before trimming either piece.
| Detail | What it means | Planning check |
|---|---|---|
| Panel gap | A break between separate body parts, such as a door and rear quarter. | Each part must move without pulling the neighbouring film. |
| Butt join | Two film edges meet without one covering the other. | Confirm that this joint is suitable for the film and location. It provides no overlap to cover a misplaced edge. |
| Overlap | One piece covers the edge of another. | Agree the visible edge, layer order and film-specific allowance. |
| Inlay | A separate piece covers a difficult area before the larger piece meets it. | Plan its contact area and the final join before fitting the main sheet. |
A butt join is not automatically a better finish than an overlap. An overlap may suit an installation that needs a supported meeting edge, while a deliberate inlay can avoid concentrating stretch in a recess. Judge the detail against the film, panel shape and agreed appearance.
Leave material for the intended return or overlap
Before trimming, decide where the film will finish and how much usable material that route requires. A short edge cannot be repaired simply by stretching it farther around a corner. Excess material can also fold or interfere with a nearby seal if the return has not been planned.
There is no single overlap or edge allowance suitable for every car, film and installation detail. Use the material’s instructions and the actual panel access. Agree visible joins beforehand. A small sample of the proposed overlap can help an owner understand what will remain visible on a bumper or complex recess.
Cut position and film tension must be considered together. Material pulled tight around a corner can load the finished edge. The remedy may involve feeding available film, changing the layout or using an agreed join, rather than drawing a sharper line. Our comparison of stretching and laying vinyl explains those forming choices separately.
For Supreme Wrapping Film, the cited Avery instructions place overlapping panels from rear to front or bottom to top and require each overlapping panel to receive its specified treatment before the next is fitted. Keep that product-specific sequence separate from the appearance of the decorative split.
Check film direction and protective surface layers
A change in reflection across a seam can come from material orientation as well as cut alignment. Review directional films before cutting the pieces from the roll. Keep the agreed orientation recorded, particularly where several panels or a replacement piece must appear consistent.
3M’s vehicle colour-change bulletin gives orientation requirements for 2080 finishes and advises checking directionality across the installation. It also distinguishes where marking tools can be used. Do not transfer a grease-pencil recommendation from a protected gloss face to an unprotected matte or textured surface.
Some films have a temporary protective surface layer. Account for it when testing a tape cut and when finishing an edge. The clear sheet on top is not another permanent colour-wrap layer that should be tucked into every return.
The 3M 2080 tips sheet explains that compatible knifeless tape can cut through its film and protective layer. It calls for peeling that layer back when finishing corners and panel edges, and removing it before post-heating. These are instructions for that product, not a universal sequence for every wrap.
Find the cause of an untidy cut before repeating it
Start with a separate sample and check one variable at a time. The appearance of the defect is a clue, rather than a complete diagnosis.
| What you see | Check | Next step |
|---|---|---|
| Filament breaks | Tape variant, film layers, starting procedure and obstructions. | Use the product’s recovery method on the sample. Avoid substituting a blade against paint. |
| Film tears or leaves a ragged edge | Sample construction, starting-edge support and pull direction. | Correct the setup and obtain a clean sample cut before continuing. |
| Boundary wanders | Carrier folds, a stretched route or a decorative line viewed only close up. | Recheck the layout from normal viewing distance before fitting replacement material. |
| Carrier remains underneath | A visible strip or an unexpected ridge beside the cut. | Remove the remaining carrier using the tape instructions, then inspect edge contact. |
| Finished edge lifts | Contamination, tension, usable return and completion of finishing. | Assess the cause before deciding on correction or replacement. |
A short piece, torn edge or contaminated adhesive may require fresh material. Repeated pulling, extra heat or household glue can change the problem without producing an acceptable finish.
Inspect the finished line before handover
Look at the clean surface in broad light, then inspect the edge closely. Check the route from normal viewing distance before concentrating on tiny details. A reflected light strip can help reveal a wavering decorative boundary or a local change in sheen, but one photograph does not explain the cause.
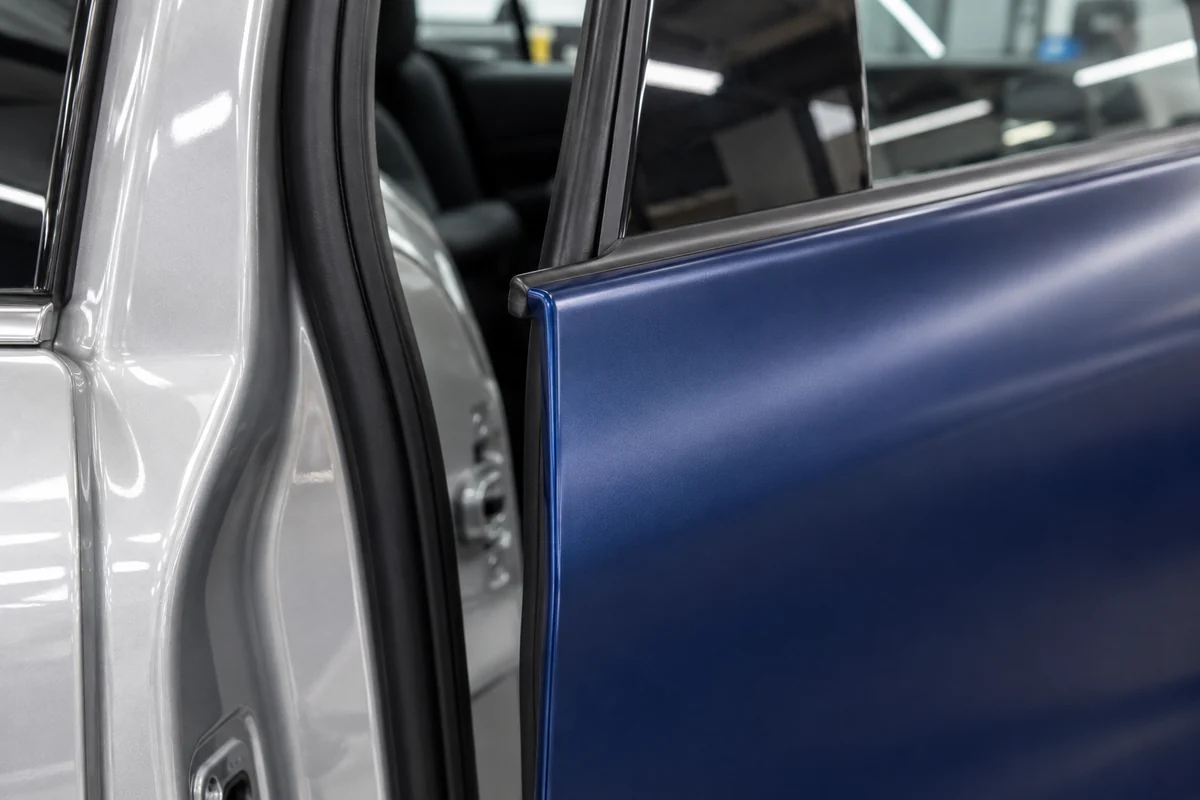
- Line and alignmentCheck the agreed design route and its continuation across separate panels. Look for a torn end or an unintended change in direction.
- Edge contactLook for a loose corner, trapped carrier strip, exposed adhesive or a return that has folded rather than seated correctly.
- Access and movementConfirm the relevant doors, handles and flaps operate normally, and that seals or required openings have not been covered.
- Surface conditionRecord any visible mark or changed finish and compare with the pre-installation photographs before assigning a cause.
A lifted edge can involve contamination, material tension, unsuitable contact or fitting problems. Compare the observed edge with the agreed layout and inspect it closely before deciding whether correction is needed.
If an owner sees a cut-like mark beneath an edge, document it and arrange assessment. Peeling the wrap away or trimming it again can change the evidence and introduce another risk. Discuss the observed area with the installer before attempting a repair.
Plan the visible finish
Discuss your wrap’s boundaries and coverage
Share your car model, chosen finish and any two-tone reference. Our Al Quoz team can discuss the visible joins, panel coverage and edge details before fitting.
Common questions about cut lines
Can knifeless tape cut every vinyl wrap?
No single tape should be assumed suitable for every film and layer combination. Choose the named variant for the intended construction and route, then test a representative sample. Include laminate or a protective surface layer where it will be present during the real cut.
Should a finished wrap hide every seam?
No. Separate panels and planned overlaps may remain visible. Agree their position and appearance before fitting. A deliberate join can suit a complex shape, while trying to force one piece across it can create a different finishing problem.
How much vinyl should be left around an edge?
Use the named film’s instructions and the actual return, access and coverage plan. A universal millimetre allowance can leave one area too short and another overcrowded. Establish the finish before trimming the usable material away.
Can a car photograph become an accurate cutting template?
A photograph can guide appearance, but perspective affects size and shape. A traced outline needs measured references and verification on the actual vehicle before production. Confirm the template’s purpose and vehicle variant as well as file scale.
What should I do if the cutting filament breaks?
Pause and inspect the tape, film layers and route. Follow the product’s recovery guidance instead of forcing the remaining filament or reaching for a blade against the paint. A revised tape choice or a new test may be needed.
Can cutting tape guarantee damage-free wrap removal?
No. Making a supported cut without a blade against paint addresses a cutting risk. Later removal still depends on paint condition, film, age and the removal method. Keep these separate when discussing the installation and its limits.