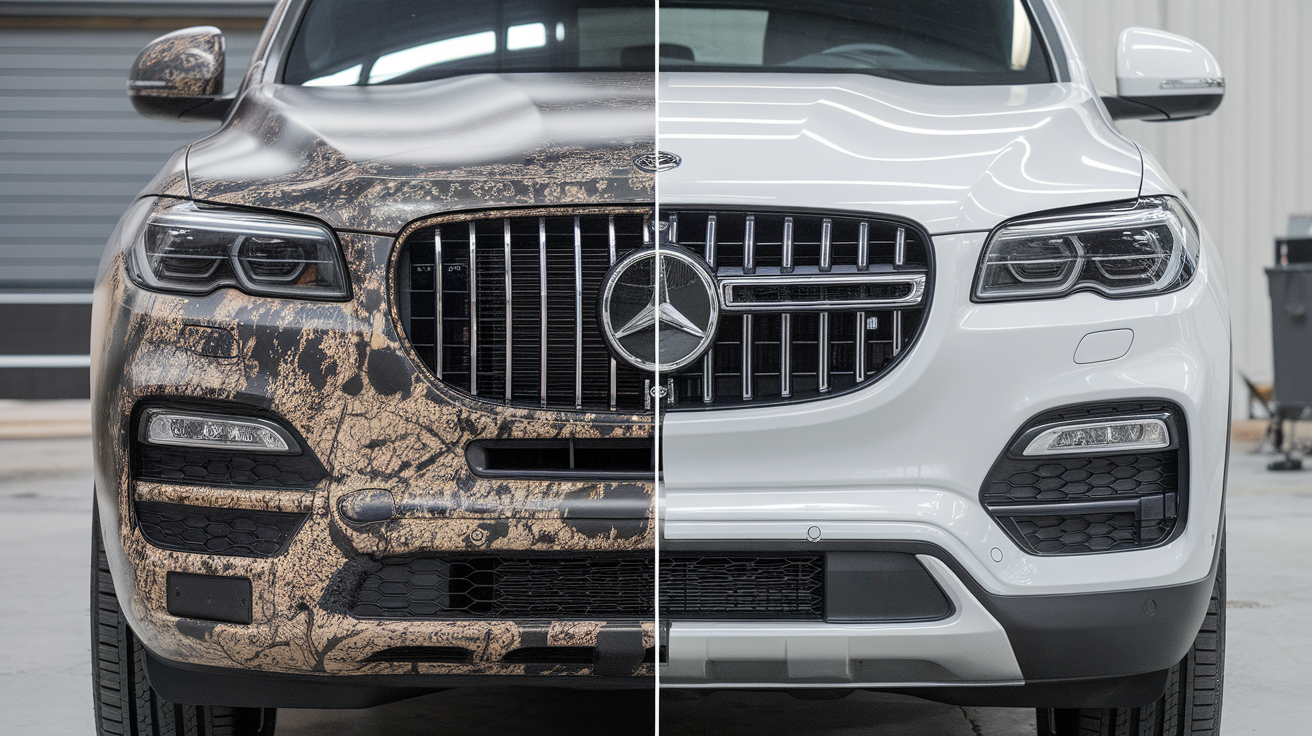
Ever wondered what really happens if you peel off a car wrap the wrong way? You could end up pulling a clear coat, scratching original paint, or leaving behind stubborn glue that refuses to go. This guide on how to remove wrap without damaging paint breaks down the real method, not guesswork, not shortcuts. Whether you are dealing with vinyl wrap removal, adhesive residue, or Dubai’s brutal heat baking the film onto your hood, we explain every step with facts, not fluff. With the right car wrap removal technique, you can protect your paint, save money, and avoid repairs that could cost up to AED 2,000 per panel. Keep reading if you want to do it clean and get your car looking like new again, without regretting a single pull.
What Can Go Wrong with a Bad Wrap Removal?
You peel back a corner, give it a slow tug and suddenly, the clear coat comes off with it. That is how fast a bad car wrap removal job can ruin your paint. In Dubai’s heat, where wraps get baked onto panels for years, one wrong move can lead to cracked finishes, adhesive stains, or warped bumpers. We have seen wraps fused so tight, they needed polishing machines just to lift the residue.
- Clear coat damage is the most common outcome.
- Paint peeling happens when the bond between vinyl and weak paint is stronger than the bond to the body.
- Melted edges or stretch marks appear when too much heat is used in a single spot.
- Scratches from metal tools are permanent, no polish will fix a gouge.
Most people think removing a wrap is easy. Until they try it. This blog is here to show you how to get it right, without damaging the paint, burning through your clear coat, or ending up at a bodyshop with a respray bill.
Does Removing Wrap Damage Paint? The Truth
If wrap removal damaged every car, nobody would be wrapping Lamborghinis, right? The truth is, removing wrap does not damage paint, bad technique does. We have peeled wraps off 5-year-old vehicles in Dubai heat without a single scratch. And we have also seen fresh wraps tear paint clean off, just because someone yanked too hard without heat or used a metal blade like they were scraping stickers off glass. Here’s how the damage actually happens:
- Old wraps (3+ years baked under Dubai sun) fuse into the clear coat.
- Cheap vinyl leaves aggressive adhesive behind.
- Improper tools like metal scrapers or harsh solvents eat into the surface.
- Weak paint jobs, especially repaints, cannot handle strong pull force.
Factory paint on most modern cars is solid enough to handle a clean car wrap removal if done right. But if your car was re-sprayed at a corner shop, had accident damage, or the wrap was installed without surface prep, then yeah, you are in risky territory.
So does vinyl wrap removal damage paint? Not unless you skip the prep, ignore the tools, and treat it like a sticker instead of a process. Follow the method, and your paint stays untouched. Skip it, and you are asking for flakes, scars, and a respray quote.
When Is the Right Time to Remove a Wrap?
You do not wait until the wrap cracks like dry skin to remove it. That is not just bad timing, it is a setup for paint damage. We get it, wraps are meant to last. But in Dubai’s brutal sun, they do not age gracefully. By the time it starts fading, bubbling, or peeling at the corners, your wrap is no longer protecting your car, it is threatening it. So when is the right time for car wrap removal? Here is the truth, not the sales pitch:
- 2 to 3 years for daily drivers parked outside in the UAE sun
- Up to 5 years for garage-kept cars or high-end films like Avery Dennison or 3M
- ASAP if you see bubbling, edge lift, cracking, or color shift
- Immediately if adhesive starts bleeding or leaving stains on the surface
What people do not realize is, the older the wrap gets, the stronger the adhesive becomes. It hardens, bakes in, and clings tighter, especially around curves and edges. Peel it too late, and you are pulling against the clear coat. Peel it at the right time, and it comes off smooth, clean and safe. If your wrap is starting to look tired, dull, or inconsistent, that is not a styling issue, it is a removal cue. Waiting longer is not saving you money, it is risking your original paint.
Can You Remove a Car Wrap Yourself? Maybe. Should You? That’s the Question.
Peeling off a wrap might look like a weekend job, but get one step wrong, and you are dealing with glue scars, lifted paint, or worse. Before you dive into car wrap removal, it is worth weighing both options.
When DIY Removal Might Actually Work
If the conditions are right, doing it yourself can save you time and money.
- The wrap is less than 2–3 years old
- You are dealing with flat panels (like the hood or roof)
- The car has original factory paint, no resprays or accident repairs
- You have the right tools, heat gun, plastic blades, adhesive remover
- You are okay spending a few hours and being extra patient
If this sounds like your situation, good news, we will walk you through the safest removal process in the next section.
When It Is Better to Think Twice
Some jobs look simple, until they start peeling your clear coat.
- Wrap is old, cracking, or lifting at the edges
- It has been baked in Dubai’s sun for more than 3 years
- Your car has repainted panels, body filler, or past accident repairs
- You see bubbling, discoloration, or excess glue around corners
- You are unsure what kind of film or adhesive was used
These are the moments where DIY turns into damage. And once paint comes off with the wrap, no polish will fix it.
Still Thinking DIY? Ask Yourself This
- Can I spot signs of weak paint or hidden repairs?
- Am I confident using heat evenly and safely?
- Do I know when to stop and try another method?
If you are even slightly unsure, keep reading. We are about to break down the full process step-by-step. But know this: doing it wrong will cost you way more than doing it slow. You have the power to decide. Just make sure you are making that decision with all the facts in front of you.
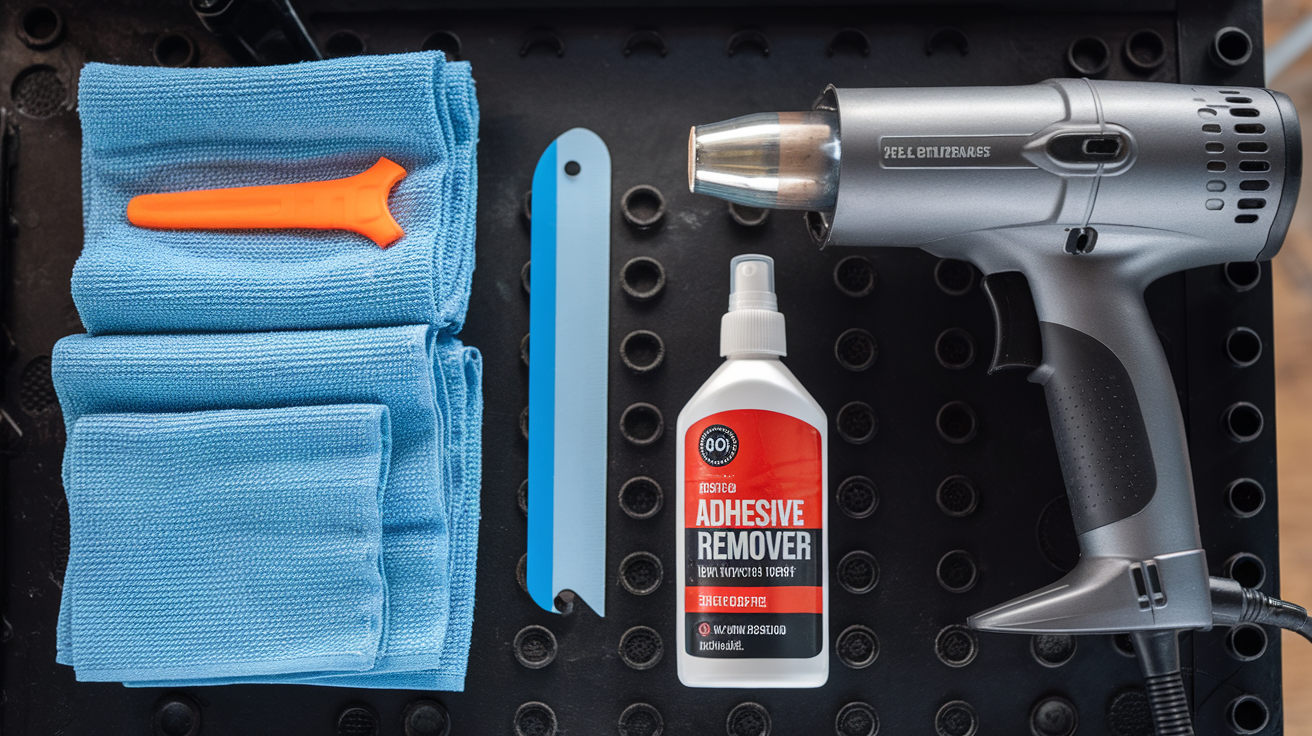
What Tools You Need to Remove Wrap Without Damage
Try removing a wrap with the wrong tools, and you might get more than just frustration, you could end up scraping your paint, warping plastic, or burning adhesive right into the clear coat. We have seen it too many times. People grab a random scraper and a hair dryer, thinking it will be quick work. The truth? Car wrap removal needs the right kit, no shortcuts. Here is your no-nonsense checklist for removing a wrap without damaging the paint underneath:
Heat Tools (Non-Negotiable)
You cannot pull cold vinyl. Heat softens adhesive, makes peeling easier, and reduces paint risk.
- Heat gun with adjustable temp control (ideal: 60–65°C / 140–150°F)
- Hair dryer (only for thin or new wraps, not ideal for tough jobs)
- Infrared thermometer (optional, but helps avoid overheating panels)
Paint-Safe Peeling Tools
No metal. No glass scrapers. Only use tools designed for vinyl on paint.
- Plastic razor blades – perfect for starting corners safely
- Wrap squeegees or edge lifters – help guide large sections without scratching
- Soft-tip panel tools – for tight trims, handles, and badges
Adhesive Clean-Up Gear
Once the wrap is gone, glue stays behind. These help remove it safely.
- Citrus-based adhesive remover – strong on glue, gentle on paint
- Isopropyl alcohol (70–90%) – great for residue after glue removal
- Microfiber towels – avoid old rags that can drag or scratch
- Clay bar (optional) – for leftover glue particles stuck to the surface
Surface Prep and Panel Protection
You want a clean peel. That means starting with a clean, safe surface.
- pH-neutral car shampoo – cleans without stripping sealants
- Nitrile gloves – avoid oily fingerprints during peel
- Masking tape – protect rubber trims and sensors during heating
- Detailing spray or wax (optional) – for the final shine after removal
Skipping any of these tools means adding risk. You might get lucky with a DIY shortcut once, but the next time, it could cost you a full respray. Whether you’re working in a garage or your driveway, these tools make the difference between a clean peel and a regretful scratch. One of the most critical? Heat application. Not all guns are equal, and we break down what to look for in our Best Heat Gun for Car Wrap blog so you don’t melt, burn, or stretch your wrap the wrong way.
Prepare the Surface Before Peeling
Peeling without prepping is like painting over dust, you might not see the mistake right away, but it shows up later. If you want smooth car wrap removal without damaging paint, surface prep is a must. It only takes a few steps, but skipping them can lead to adhesive drag, scratches, or uneven heat application. Here’s what to do before you start peeling:
- Wash the Car
- Use pH-neutral car shampoo (avoid harsh cleaners)
- Focus on panel gaps and edges where dirt collects
- Dry fully with microfiber towels
- Protect Trim and Sensors
- Apply masking tape around rubber trims and plastic edges
- Cover badges, sensors, and delicate parts near the peel zone
- Helps prevent accidental heat damage or tool contact
- Pick a Safe Work Spot
- Avoid direct sunlight, heat can get unpredictable
- Work in a shaded or covered space
- Early morning or evening is best in hot areas like Dubai
- Wipe Down Before You Start
- Use isopropyl alcohol (70–90%) on each panel
- Removes oils, wax, or fingerprints that interfere with peeling
- Do this right before applying heat
These few minutes of prep go a long way. Clean panels peel smoother, adhesives release better, and you avoid pushing dust or grit into your paint.
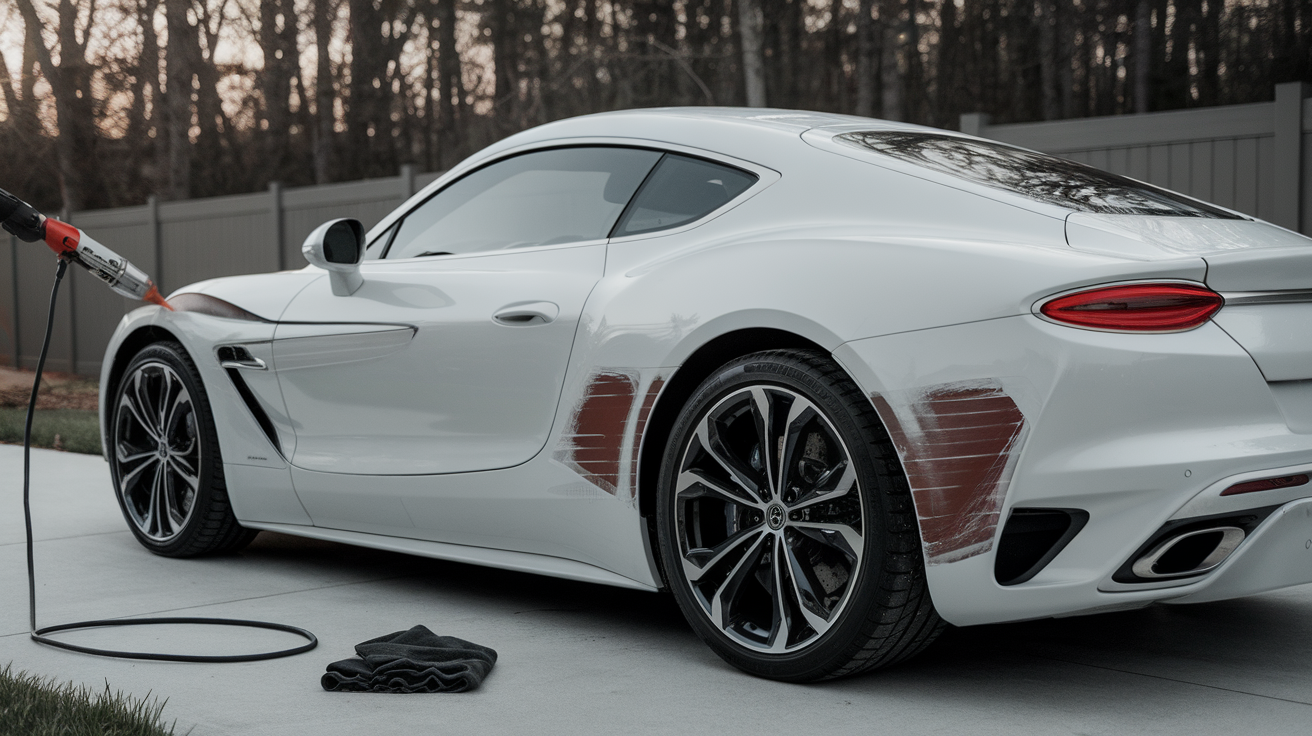
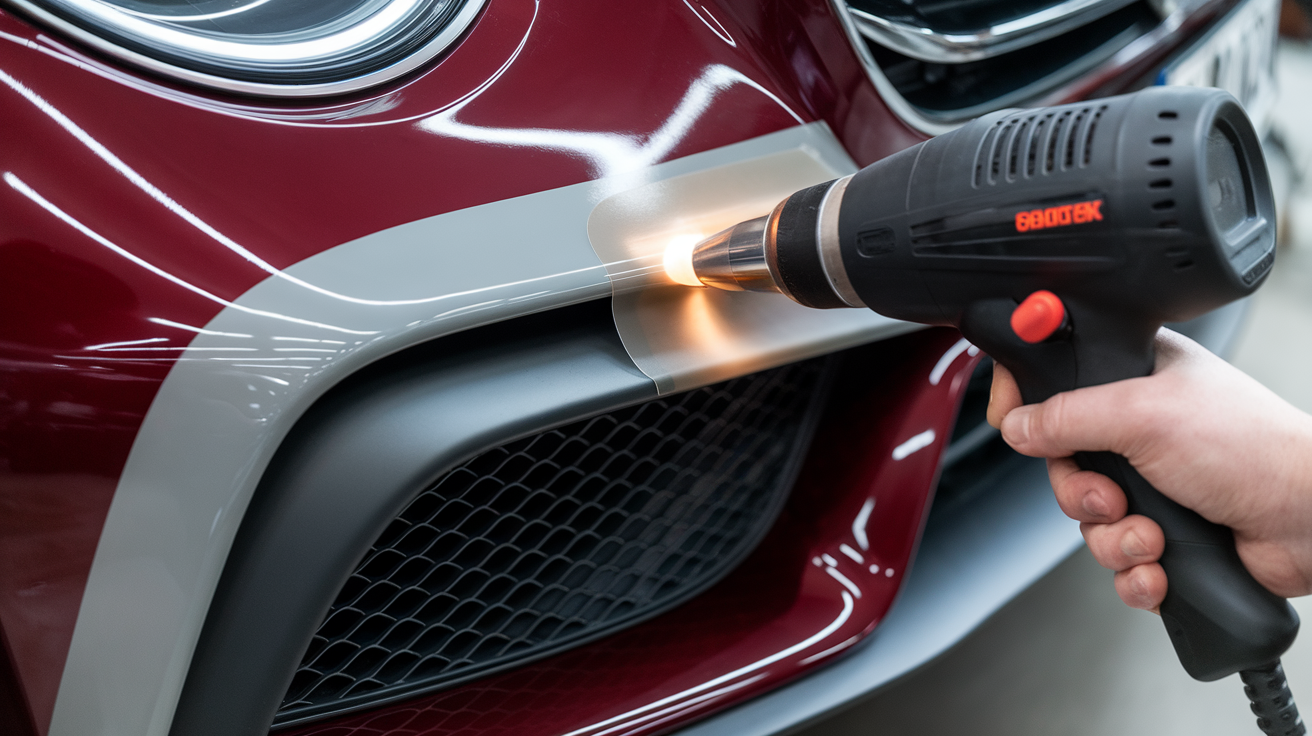
Best Way to Heat the Wrap
Most people mess up wrap removal before they even start pulling by overheating, underheating, or blasting one spot too long. If you’re aiming for clean car wrap removal, the key is controlled heat. The goal is to soften the adhesive, not melt the vinyl or burn the clear coat underneath. Here’s how to heat the wrap the right way:
Use a Heat Gun with Temp Control
- Set it between 60–65°C (about 140–150°F)
- Sweep it constantly, never hold it still on one spot
- Keep a 10–15 cm distance from the panel surface
Hair Dryer as Backup (Not Ideal)
- Works only on new wraps or thin vinyl
- Takes longer and often lacks heat consistency
- Not suitable for curves, bumpers, or textured films
Work in Small Sections
- Heat one panel at a time, don’t warm the whole car
- Focus on corners and curves first, they’re the toughest
- Always reheat before peeling more if vinyl feels stiff
Mind the Weather
- Dubai’s heat helps but it’s not enough on its own
- Avoid peeling in direct midday sun, it can overheat panels
- Early morning or indoor shade gives better control
Heating is not about speed, it is about control. Too cold, and vinyl cracks. Too hot, and paint suffers. Use steady, even motion, and listen to the wrap, it’ll tell you when it’s ready to lift.
Step-by-Step Guide to Peel Wrap Safely
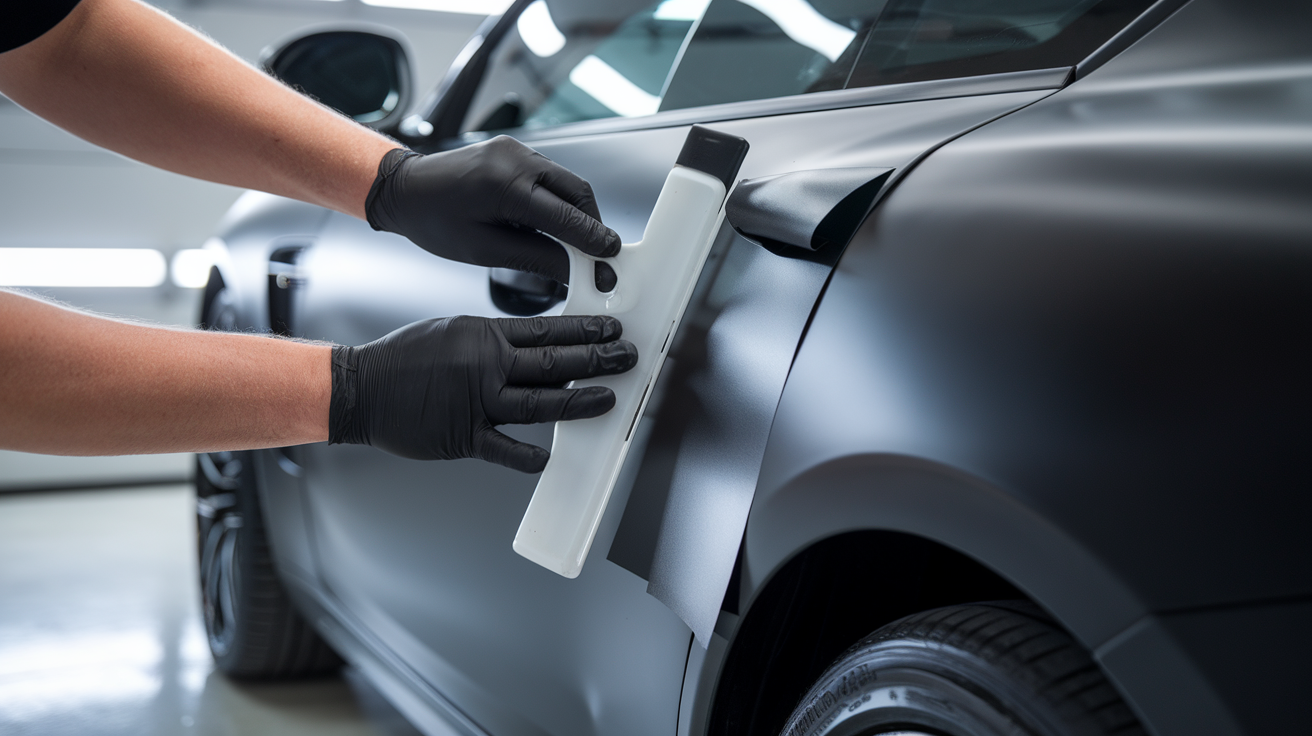
You’ve done the prep, applied the heat, and now it’s time for the main act, peeling. But this is where most people go wrong. One bad pull, and the wrap either tears, leaves half the adhesive behind, or worse, takes the paint with it. If you’re aiming for a smooth, damage-free car wrap removal, follow this peeling process exactly. Here’s your step-by-step guide to peeling safely, cleanly, and without regret:
- Start at a natural edge or seam using a plastic razor blade – Choose a corner where the vinyl is already lifting, or gently slide in a plastic blade. Never use metal, it scratches instantly. For tight spots like door trims, use a wrap edge lifter or squeegee. This sets up the rest of the vinyl wrap removal cleanly.
- Peel at a 30–45° angle toward yourself, not upward – Pulling straight up puts direct tension on the paint. A shallow pull reduces pressure on the adhesive and prevents it from yanking off clear coat. Always keep your movements steady—no jerking or sudden pulls.
- Apply heat continuously as you peel – Every 20–30 cm, stop and reheat the area ahead. You want the vinyl soft and stretchy, not cold and brittle. If it resists or tears, it needs more heat. Overheated areas may get too soft and leave more glue, so aim for balance.
- Use small sections, especially around curves and bumpers – Do not try to peel large, tricky areas in one go. Cut vinyl around mirrors or handles with a plastic cutter, then remove piece by piece. Bumpers, curves, and textured films need more patience and heat control.
- Avoid tearing, lift the wrap in full panels when possible – If the vinyl breaks apart, the job gets messy fast. Peeling large sheets evenly helps reduce adhesive residue and saves time on clean-up. For aged wraps or printed films, breaking may still happen, just keep your angle consistent.
This part of the process decides how clean the removal turns out. Done right, the vinyl comes off in smooth sheets with minimal glue left behind. Done wrong, and you are spending hours scraping bits and polishing out scratches. Take your time, because speed in wrap removal often leads to regret.
Wrap Removal Gone Wrong? Here’s What to Watch For
If any of this starts happening, stop and reassess. Forcing it will only multiply the damage. Sometimes it is not about how careful you are, it is about the wrap’s age, the paint’s history, and Dubai’s unforgiving heat. Not every job can (or should) be handled solo.
If you are halfway through and things are going sideways, do not wait for real damage to happen. We deal with failed wrap removals all the time and we know exactly how to fix it without making things worse. Contact us for expert help, honest advice, or even just a second opinion. A quick message might save your paint, your time, and a lot of money.
Common Mistakes That Ruin Paint
Car wrap removal is not the hard part, doing it without damaging your paint is. Most paint damage happens because of small mistakes that seem harmless in the moment. Whether you’re removing a wrap in a shaded garage or under Dubai’s morning sun, these slip-ups can turn a simple peel into a full-body respray. Here are the most common mistakes that ruin paint during car wrap removal:
- Peeling without proper heat control – Cold vinyl clings to paint. If you skip the heat gun or use too little warmth, the vinyl resists and puts stress on the clear coat. Every clean car wrap removal starts with softening the adhesive.
- Holding heat gun too close or too long – Too much heat can melt the vinyl and damage the paint underneath. Keep the heat gun moving and stay 10–15 cm away. Controlled heating is key to safe vinyl wrap removal.
- Using metal blades or sharp scrapers – One swipe with a metal tool and your clear coat is permanently scratched. Always use paint-safe tools like plastic razor blades or squeegees designed for wrap removal.
- Pulling the vinyl straight up instead of at an angle – Pulling vertically increases tension on the paint. Always peel at a shallow 30–45° angle toward yourself to reduce the risk of lifting the clear coat.
- Skipping panel prep before removal – Dirt or dust under the wrap becomes sandpaper when you peel. Wash the surface thoroughly and wipe with isopropyl alcohol before starting any car wrap removal process.
- Using harsh chemicals to clean glue – Solvents like acetone or thinner may remove adhesive, but they’ll also ruin paint. Use citrus-based adhesive removers or isopropyl alcohol to clear residue without damage.
Every clean car wrap removal depends on what you avoid as much as what you do. One bad habit, one wrong tool, or one rushed peel can cost you more than the wrap was ever worth. Do it slow, use the right angle, and treat every panel like paint correction, not a sticker job.